Showing posts with label Benefit cosmetics. Show all posts

Friday, September 14, 2012

Benefit Pore Professional Review!!

A few months ago, I bought a Glamour magazine that included a free sample of Benefit Cosmetic's Pore Professional.  I've been using it every day since then and have been meaning to write a review on it. 


For those of you who are unfamiliar with this product, it's a pore minimizer and claims to reduce the appearance of pores and fine lines.  How do you use it?  Well, this product goes on after your moisturizer and before or after foundation.  I tried it both ways and I find it works better under foundation as it has a little bit of colour and when applied under, blends with my foundation better.  For those of you with skin tones that match the colour of the pore minimizer, it may work just as well if you apply it over your foundation.  You only need to apply it to the areas of your face where your pores are the most noticeable. For me, those are my cheeks and T-zone. 

To be honest, I haven't really experimented with pore minimizers much but in the past have tried a sample of Clinique's pore minimizer.  I was never a fan of the Clinique product as the texture was a bit thick and the colour was way too light for my complexion. 

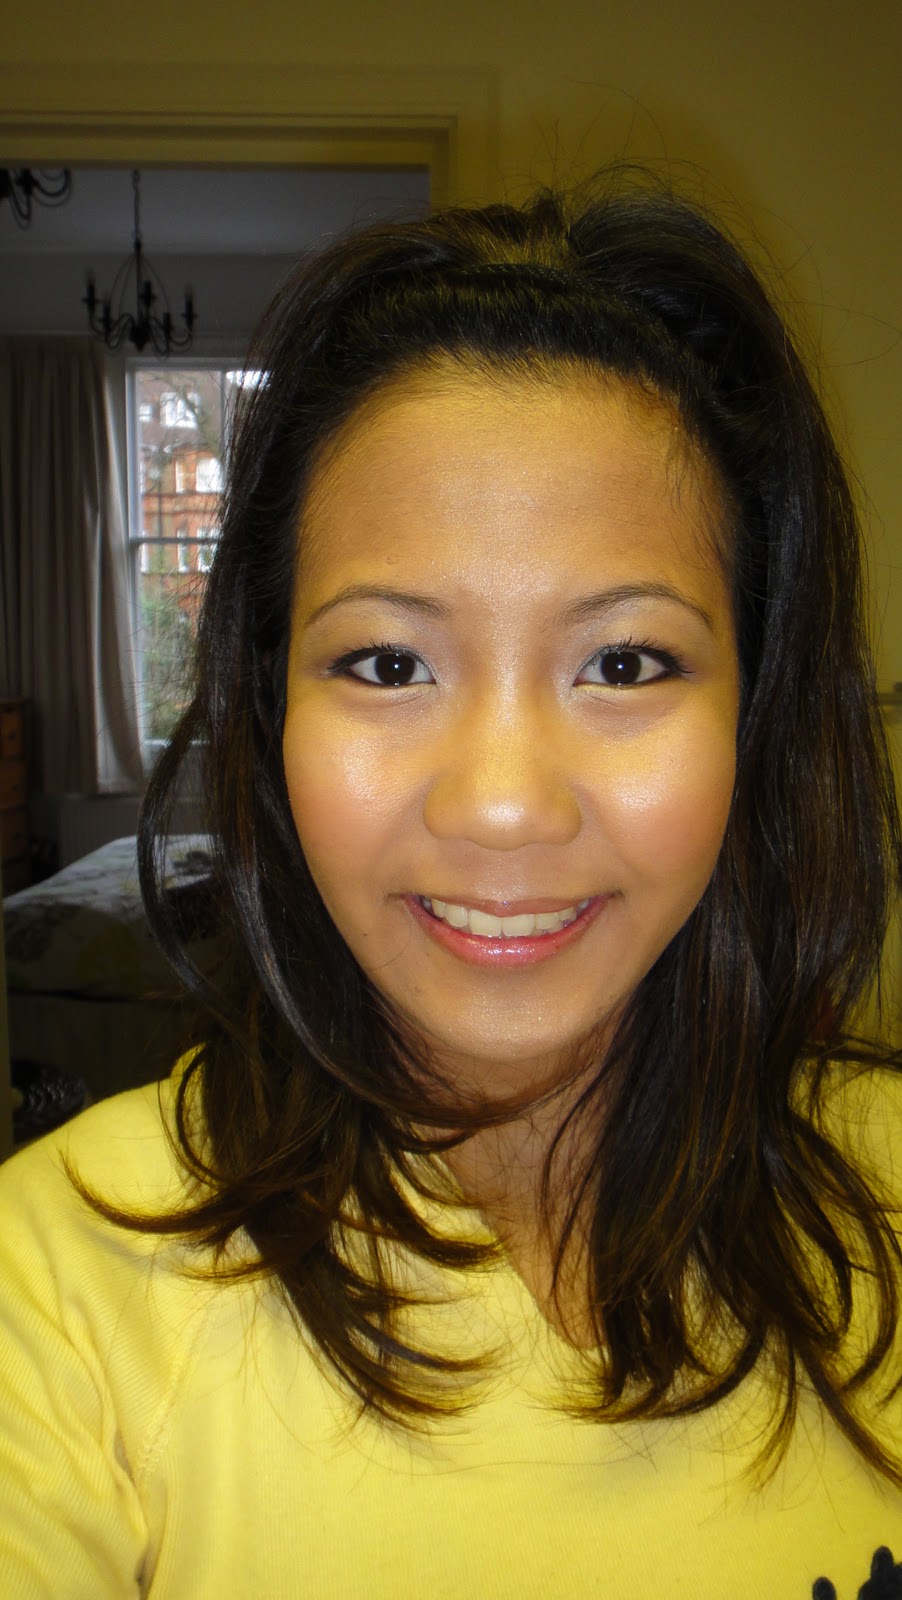
In contrast to that, Benefit's Pore Professional has a more natural colour that blends into my skin nicely.  It's almost unnoticeable and when applied under foundation, just disappears.  It has a very light texture that feels very smooth when applied to the skin.  The first time I applied it to my T-zone and upper cheeks, I thought it might be a little greasy and was a bit concerned as I have oily skin.  However, when I completed my look, I did notice that my pores really did appear to be less noticeable and my skin looked more even in texture.  It also mattified my complexion without giving it a dull look. 

How does it hold up throughout the day?  Well, I am pleasantly surprised that day after day, in both cold and hot weather, this pore minimizer has proven itself.  At the end of a work day, my makeup is still in tact, non-greasy and my pores are still less noticeable.  I do have fairly large pores especially on my nose so for those of you with even less noticeable pores, this product will perform even better.  Having said all that, don't expect your skin to look like it has been airbrushed and photo shopped.  It does even out the texture but you won't look completely pore-less!!!   

The little thumb size sample has lasted me several months so the full sized tube should last through the year.  You only need a little bit at a time.  An amount the size of half a hole punched piece of paper is all you need for your cheeks and T-zone. 

I'm just about done with my sample and ready to purchase a full sized tube. 

Sunday, January 8, 2012

Big Dolly Eyes!!!

Last week, I went on a rant about the whole dolly eyes trend in Asia.  Well, I've never really tried the look before but there are countless tutorials on YouTube that teach you how to do it.  Here is my guide to my version of the look.

The general idea is to create an illusion of deep set eyes.  If you already have deep set eyes you can skip to eyeliner after applying your eyeshadow how you normally would.

If you have narrow eyelids like I do or have monolids, you can create the illusion of deep set eyes by applying your darkest colour in the area where your eye socket goes in, just below your brow bone.  This would be the area where your eyelids would recede if you had deep set eyes.  Apply this colour on your outer corners too.

When using eyeliner, extend it past the natural edges of your eyes and bring the eyeliner down, lining only the outer area of your lower lash line.  Use white eyeliner on your water line.

Highlight the inner corners of your eyes and put on some false eyelashes.

Many girls will wear circle lenses to complete the look but since lasik surgery a few years ago, I'm afraid of wearing any type of contact lens.

Use blush only on the apples of your cheeks and a pink glossy lipstick to finish off the look.


Important tip:  If you want to to create a more voluminous but natural eyelash look, instead of wearing a chunky pair of false lashes, use the criss-cross type instead but double them up.

What I used:


FACE: Missha Perfect M BB Cream in #31, MAC Studio Fix Fluid in NC45, MAC Studio Fix Powder in NC43, MAC contour powder in Shadester, Benefit Cosmetics Watts Up

EYES: MAC Prep and Prime in medium, MAC Paintpot in Bare Study, MAC eyeshadows in Pink Freeze and Satellite Dreams, Dior Show waterproof pencil eyeliner in black, Kryolan eyeshadow in white, N17 eyebrow pencil in natural brown, 2 pairs of criss-cross eyelashes

CHEEKS: Clinique blush in Iced Lotus

LIPS: MAC lipstick in Angel, Forever 21 clear lipgloss

Wednesday, December 28, 2011

What About Mascara???

When it comes to mascara, the vast range available is quite remarkable.  There's waterproof, curling, volumizing, lengthening, conditioning, vibrating...you name it, it's out there.  Like me, you've probably tried all kinds of mascaras and from many different brands.  You've probably questioned whether most of these really did the job as well.  And one of the most common questions is whether a truly "clump-less" mascara exists. 

Curling mascara:
In my experience, as someone with pretty straight Asian eyelashes, curling mascaras don't really work on their own.  You're better off using an eyelash curler with a volumizing or lengthening mascara.

Volumizing mascaras:
This is the type of mascara I use.  I find that a good volumizing mascara really does do the trick.  My favourites have been Dior Show Black Out, L'Oreal Paris Extra Volume Collagen, Majorlica Majorca Lash Enamel Glamour and Maybeline Volume Express Cat Eyes.

Lengthening mascaras:
I've tried several lengthening mascaras in the past but prefer volumizing ones as my eyelashes are fairly long already. The problem I have is that they are not very thick.  I find it looks a little funny to have several "strands" of eyelash hairs fanning out from my eyes.  However, the lengthening mascaras that I felt worked well were L'Oreal Double Extension Ultra Lengthening and Maybeline Sky High Curves.

My all time favourites:
Mascaras come with different types of applicators.  Most of you are familiar with brush applicators in various sizes. 


Now there are applicators that look like little rubber combs. My Majorlica Majorca and Maybeline Volume Express mascaras have these applicators.  I prefer them as I find the product does not clump on the brush and therefore does not clump on my eyelashes. 


Important tips:
1) If your mascara does clump on your lashes, remove the clumps with an eyebrow grooming brush.  It looks just like a mascara applicator.  Comb it through your eyelashes from above, rolling the brush at the same time.  The mascara clumps will get caught in the bristles and get brushed out!!!


2) I've bought expensive, department store brand mascaras as well as pharmacy brands such as L'Oreal and Maybeline.  I find the pharmacy brands work just as well if not better.  I've never been a fan of Clinique or MAC mascaras.  My advice is save yourselves some money!  L'Oreal, Maybeline and Rimmel all have some great mascaras that do what they promise. 

3) If you're struggling to find a mascara that curls, lengthens and volumizes all in one, why not use 3 different mascaras?  I have a friend who layers her favourite lengthening mascara with her favourite volumizing mascara.  It works wonders! 

4) Finally, ALWAYS CURL YOUR EYELASHES!!!  It will open up your eyes and make them look bigger and brighter.  Shu Uemura has an amazing eyelash curler designed for Asian eyes.  It is shaped to catch every lash from corner to corner. 

Monday, December 26, 2011

Radiant Light Traveller!!!

At this point, you have all probably gathered with the family, stuffed your faces silly and maybe drank a little bit too much.  After all the partying and family madness, I know many of you have planned a relaxing getaway.  No matter where you are, sun or snow, you always feel good when you look your best.  But with all the craziness of Christmas travel, you want to pack light to avoid the long line ups at the check in counter or even worse, the airline losing your luggage in all the chaos.  Trying to fit everything can be frustrating so here are some tips on how to bring your makeup with you, look radiant and refreshed on your holidays and keep the frustration of trying to fit your cosmetics to a minimum.

The number one way to save space is to bring products that have multiple uses.  These are my holiday makeup must-haves!


1) BB Cream: This is an all in one foundation, tone corrector, anti-aging cream and sunblock.  This product usually has an SPF of 30++ minimum.  BB creams are great because there are so many benefits in just one bottle. 


2) Cream highlighter:  I've mentioned before how highlighting can make you look instantly refreshed.  Don't leave the highlighter at home.  Bring a cream highlighter like Benefit Cosmetic's Watt's Up because it doubles up as a highlighter and a base for for your eyeshadow.

3) Eyeshadow:  Bring one natural coloured eyeshadow.  If you want to skip out on this, you can just use your highlighter on your eyes.  It will instantly brighten them.

4) Eyebrow pencil:  Your eyebrow pencil is usually in some shade of brown.  This is a great item to bring as it can double up as an eyeliner.  Even if you're used to wearing black eyeliner, a brown will give you great definition as well, but look appropriately natural.


5) Natural coloured lipstick:  This is a good one to bring.  Lipstick can also be used on the cheeks, as a blusher.  Apply some lipstick on your cheeks and blend it out with your fingers.  If you feel the texture of your lipstick is a little dry, use a little bit of moisturizer to help you spread the colour.

6) Mascara:  Bring a waterproof mascara with you if you're going to the beach so it doesn't run or smudge when you go in the water.  You can skip out on the eyelash curler too.  Use a teaspoon from your hotel room.  Press your eyelashes between the teaspoon and your thumb.  Trust me, it works!!!

7) Compact powder:  This is optional and only  if you have oily skin and going somewhere tropical. 

There you go!!   An extremely natural and refreshed look!


And it's just 6 or 7 small items that fit perfectly into a teeny, tiny makeup pouch.  Skip out on the makeup brushes too.  All you need are your fingers!!!

Wednesday, December 21, 2011

Matching Eyeshadow Colours: Day 3

Smokey eyes can be achieved with a whole array of colours too.  Traditionally, a shimmery grey or silver is used as the all over base colour, with a black eyeshadow on the outer corners.  However, you can create a smokey eye look with purples, blues, greens, browns etc. 

Today, I chose to go with a traditional grey as I had used a purple in my previous blog on smokey eyes. 


FOR A LOOK AT A PURPLE SMOKEY EYE, CLICK ON THE LINK BELOW:
http://jazzo-princessjasminem.blogspot.com/2011/12/smokey-eyes-for-night-out.html

What I used:


OUTER CORNER: MAC eyeshadow in Black Ted
ALL OVER BASE: MAC eyeshadow in Electra
LIGHTEST: Krayolan eyeshadow in white

FOR MORE INFORMATION ON HOW TO APPLY THESE COLOURS, PLEASE SEE PREVIOUS BLOG:
Basic Eyeshadow Application
http://jazzo-princessjasminem.blogspot.com/2011/12/basic-eyeshadow-application.html

Here are a few more colour combinations for smokey eyes!!

MAC Black Ted            MAC Blue Edge            Krayolan white
MAC Black Ted          MAC Pompous Blue          Krayolan white
MAC Black Ted          MAC Beauty Marked          Krayolan white
MAC Black Ted              MAC Mulch              Krayolan white

FOR A CLOSER LOOK AT THE EYESHADOW COLOURS GO TO:
http://www.maccosmetics.co.uk/product/shaded/154/363/Eyes/Shadow/Eye-Shadow/index.tmpl

Important tip:  In order to make the smokey eye even darker, apply a black cream shadow first.  I like to use MAC Paintpot in Blackboard.


Tuesday, December 20, 2011

Matching Eyeshadow Colours: Day 2

Today I am playing with earthy colours.  These are colours like brown, beige and rust.  You can accomplish a polished nude look with these colours, or a more intense look for the evening.  I find that brown and beige looks good on any skin tone, from fair to tanned.  However, the rust colours will definitely look better on a tanned skin.  But play around if you like it.  You never know what you will come up with!!!

Today, I chose to combine a rust with a much darker colour in the outer corners of my eyes.  It's more intense and looks good for an evening out but natural enough to be worn in the day. 


Here's a closer look at the eyes!


What I used:

Outer corner             All over base colour             Lighter colour
OUTER CORNER: MAC eyeshadow in Blue Edge
ALL OVER BASE: MAC eyeshadow in Mythology
LIGHTEST: MAC eyeshadow in Nylon

FOR INFORMATION ON HOW TO APPLY THESE COLOURS PLEASE SEE PREVIOUS BLOG:
Basic Eyeshadow Application  
http://jazzo-princessjasminem.blogspot.com/2011/12/basic-eyeshadow-application.html 

Here are a few more colour combinations with earthy colours!!!

MAC Mythology            MAC Gleam            MAC Nylon
MAC Mulch             MAC Mythology             MAC Nylon
MAC Mulch          MAC All That Glitters          MAC Nylon
MAC Black Ted                  MAC Mulch                  MAC Nylon


FOR MORE INFORMATION AND A CLOSER LOOK AT EACH EYESHADOW COLOUR, GO TO:
http://www.maccosmetics.co.uk/product/shaded/154/363/Eyes/Shadow/Eye-Shadow/index.tmpl

Important tips: 

1) The general rule (although I hate the term 'rule' for makeup) is that lighter colours should be worn in the daytime and darker colours in the evening.  If you do want a more intense look for an evening out, play around with darker colours on the outer corners of your eyes.

2) In order to fade the colours into each other nicely remember to BLEND, BLEND, BLEND!


Friday, December 16, 2011

Frosty Friday!!!!

It's finally Friday and it's a cold one!!!  I was sitting in my apartment freezing my butt off and somehow just got inspired by the cold winter day!  Here's a look inspired by this Frosty Friday!!!  It's a little more dramatic than usual, but take away the bottom lashes and I think you might be able to get away with it on a night out on the town!!!  Enjoy!!!


Here's a closer look at the eyes!!!


What I used:


FACE: Missha Perfect M BB Cream in 31, Covergirl stick concealer in , Benefit Cosmetics Watt's Up, MAC contour powder in Shadester, Covergirl loose translucent powder in medium

EYES: Covergirl stick conealer in 710 , Sephora eyeliner in white, MAC eye shadows in Blue Edge and Tilt, Ros n Roy eyeshadow in a silvery white (no name), 17 eyebrow pencil in natural brown, Dior Show waterproof pencil eyeliner in black, Makeup Forever Aqua eyes eyeliner in blue, K-Palette 1 Day Tattoo Real Lasting Eyeliner 24 Hr in black, Rimmel Max Volume Flash mascara in black, criss cross eyelashes, end piece of a drug store brand false eyelash set

CHEEKS: MAC eyeshadow in Electra (to just give some added metallic shimmer)

LIPS: Dior Addict lip gloss in 257

Thursday, December 15, 2011

Basic Eyeshadow Application!

I realized after blogging about two different looks, for those who are fairly new to makeup, I should probably explain some basic eyeshadow application techniques.  I keep writing reminders to use darker colours on the outer corners and lighter colours in the inner corners and BLEND!  But what does all this really mean??  This may clear things up a little.

STEP 1:
After applying your eyeshadow primers (I like MAC Prep and Prime with paintpot over it) over the entire surface of your eyelids, the first colour you should apply is your medium base colour.  Apply it over the eyelid but stop at where you feel the bone of your eye socket.


STEP 2:
Blend to soften the hard edges!


STEP 3:
Apply the darkest colour to the outer corners of your eyes!


STEP 4:

Blend to soften the hard edges and to fade it into the first colour!


STEP 5:
Apply the lightest colour on the inner corners of the eyes, just above your lashes, right on the corners and right below the lower lash line.


STEP 6:
Blend to soften the hard edges!


STEP 7:
Apply the same light colour as you did in the inner corners but this time on your brow bone, just below your eyebrows!


STEP 8:
That's right!!!  Blend to soften the hard edges and to let it fade into the colour below it so that all the colours now melt together!


STEP 9:
Almost there!!!  This is what it looks like all together!


STEP 10:
Apply eyeliner, mascara and eyebrow pencil!  Voila!!!  You are done!!!!


Important tips: 

1) You can apply this technique to any colour combination you choose!!!

2) CLEAN UP YOUR EYEBROWS, it'll look so much nicer.  I know...I'm so in need of an eyebrow cleanup myself!!!

The Difference Highlighting and Shading Can Make!!!

Remember in my second blog I wrote about Benefit Cosmetics' Watt's Up highlighter?  Well, along with a contour powder, you can really create an illusion of having higher cheekbones, a sharper or narrower nose and an overall more 3D look that you see on the models in magazines.

BEFORE
AFTER
Remember: Anything you highlight comes forwards and anything you shade goes behind!!! 

Highlight: middle of forehead, highest part of your cheekbones, along the centre of your nose, your chin and your Cupid's bow (above your lips, the centre part that makes a sort of V shape)

Shade: the hollows of your cheeks (the part below where you would put blush), the sides of your nose, your temples and below your chin (to hide possible double chin)

Important tips: You can use a number of products to create the effect.  Rather than using specific highlighters like my favourite Benefit Cosmetics Watt's Up, you can also use a concealer a shade or two lighter than your skin tone or even a foundation.  Same thing for the shader.  Use a foundation one of two shades darker than your regular foundation.  And remember....BLEND, BLEND, BLEND!!!!

What I used:


Highlighter: Benefit Cosmetics Watt's Up

Shader: MAC contour powder in Shadester


Clean and Professional

This a a look I do fairly often.  It's just a very neutral and clean look that is perfect for work or what I call "my interview makeup".  It's fairly quick and easy and I do this look on days when I'm just going out and about and I want to look refreshed but not too done up.


Important tips: 

1) Use very neutral beige and browns for this look.  Again, the darkest colour on the outside and lightest on the insides and blend, blend, blend!!!!

2) To make sure your eyeshadow lasts all day, layer it.  I use a prep and prime cream, a cream eyeshadow and then my eyeshadow.  

 3) There is also no need to use false eyelashes for this look.  I personally feel it's uncomfortable to wear every day and it can give you an overly done up look.  If you really want to, then use falsies that come in little individual pieces and just put them on the outer corners of your eyes.  Or, you can just cut the ends of a full set and do the same thing.

Here's a closer look at the eye makeup!!!


What I used:


FACE: Amazing Cosmetics concealer in medium beige, Missha Perfect M BB Cream in 31, MAC Studio Fix Fluid in 45, Benefit Cosmetics Watt's Up, MAC contour powder in Shadester

EYES: MAC prep and prime eyes in medium, MAC paintpot in Bare Study, MAC eyeshadows in Soba, Mulch and Nylon, K-Palette 1 Day Tattoo Real Lasting Eyeliner 24 hr in black, Rimmel Max Volume Flash mascara in black, Dior Show pencil eyeliner in black, 17 eyebrow pencil in natural brown

CHEEKS: Clinique blush and bronze duo in Iced Lotus and Sunkissed

LIPS: Dior Addict lip gloss in 257

Wednesday, December 14, 2011

My Makup Pick of the Month!!!


My new favourite highlighter...Benefit Cosmetic's Watt's Up!!!!  I use it on the high points of my cheekbones, on my nose, forehead and chin.  That flawless look you see on models in ads and stuff...it's really because the makeup artists have used a highlighter and contour powder to create a more 3D look to the face.  Even if this is all I use over my foundation and nothing else but mascara, I feel like I look refreshed and ready to go!!!!

Smokey Eyes for a Night Out!!

One of my favourite ways to look dressed up for the night is to do a medium intensity smokey eye.   This one is done using purples and black.


Important tips: Use the lightest colours in the inner corners of the eyes and the darkest on the outer corners of the eyes and blend, blend, blend!!!

Here is a closer look at the eye makeup!


What I used:


FACE: Missha Perfect M BB Cream in 31, MAC Studio Fix liquid foundation in 45, Benefit Watt's Up (to highlight cheekbones, nose and forehead), MAC contour powder in Shadester (to shade my nose and cheeks)

EYES: MAC prep and prime for eyes in medium, MAC paintpot in Blackboard, MAC eyeshadows in Satellite Dream, Beauty Marked, Black Ted and Nylon, MAC fluidliner in blacktrack, Dior Show eyeliner in black, 17 eyebrow pencil in natural brown, Rimmel Max Volume Flash mascara in black, criss cross eyelashes, Duo eyelash adhesive

CHEEKS: MAC blush in Peachtwist

LIPS: MAC lipstick in Angel and Lustre, Cover girl stick concealer in 710