Showing posts with label Makeup aritist. Show all posts

Tuesday, September 25, 2012

Makeup over 50!!!

My mom is visiting me for a month and just like me, she never leaves home without makeup!  However, she's been doing the same look day in and day out for years.  Unlike many women her age who have not moved on from the makeup they were comfortable with in their 20s and 30s, my mom has moved on and experimented with current colours and products.  However, she is reaching a new period in life and a new look is in need.

As young women, we have bright, firm skin and thick, bouncy hair that's full of life and colour.  As we age, our hair gets thinner, some of us become grayer than others and women within certain cultures start covering up their heads with a scarf.  Many women hide behind their long, luscious hair in their youth, but when you no longer can depend on your crowning glory, it's time to glam up your look with makeup!!!

I'm not saying you should wear more makeup as you age.  In fact, less is best in order to look younger.  Foundation should remain light and sheer but play up your eyes as they are the most noticeable feature on your face. 

Neutral tones are great for keeping the eyes natural, but add a little smokey effect to make your eyes stand out more.  As for brighter colours, there is one I believe works for everyone and it's purple.  There are so many shades of purple to choose from.  They range from pale lilacs for cool skin tones to deep, dark purples for warmer skin tones. 

Now, back to my mom!!  She is considering embracing the tradition of wearing a head scarf.  Without being able to glam up her look with her hair, I suggested wearing a bit more makeup on the eyes!!!! A little goes a long way and I replaced her usual brown or purple eyeliner with black and added a darker corner to her single eyeshadow look.  For a natural look, I suggested pairing up MAC Beauty Marked to her usual MAC Trax.

Here's a look at my mom's look before and after. 

Before
After

Mom's efforts on her own!!!

As you can see, it's still pretty simple but her eyes have a little more pop to them!! 

This whole idea of playing up your makeup can be applied whether you are an older woman starting to thin, cover up your hair or you're a young woman who has decided on a short pixie cut and even a shaved head. 

When the focus is now mostly on your face, don't be afraid to play it up with makeup!!!

Sunday, April 15, 2012

Estee Lauder Advance Night Repair 2 Month Progress!!

A couple months ago I bought the Estee Lauder Advanced Night Repair serum and put up a post on how I was going to track the progress of my skin after using the product over a span of three months.  It's been two months since I've been using this product and the results are as follows.

Problem with lines on the sides of my forehead and deep line in the front:

After two months, I've noticed a significant reduction in the depth of the lines on the sides of my forehead.  They used to be quite deep with sort of a scaly pattern but now they are incredibly shallow and just look like very fine, shallow horizontal line...how skin actually looks.


Problem with deep lines in the front of the forehead:

I complained about a couple lines in the front of my forehead that I found to be significantly deep.  One of the lines has actually disappeared while the second one which was deeper than the first is much more shallow than it used to be.


Acne scaring and discolouration:

The acne scars have significantly lightened and I can barely notice them.  There is one particular scar that I was quite concerned with.  It was the darkest mark on my cheek but has now lightened significantly as well.  However, I don't think it will disappear completely as it is not as superficial of a scar as the rest, but there are definite improvements.


Overall:

As I mentioned before, I am also using the Estee Lauder Idealist serum together with the Advanced Night Repair.  I feel the combination of the two has made my skin more even and blemishes are really starting to fade.  Of course, I cannot say that the positive results are from one or the other as I've been using them together, but from what I've heard through other blogs, it's more likely from the Night serum rather than the Idealist serum which has had mixed reviews.

So far, I would say I am incredibly pleased with the results.  I will continue to use this product and I'm excited to see more results from long term use.

Stay tuned!!!  I will update you in one more month!!!

Saturday, March 31, 2012

Super Quick Green Eyeliner Every Day Look!

As I promised last week, I would write at least one blog a week to fill you all in on what's going on in my little makeup world.  I also did mention that the blog posts had halted temporarily due to the fact that I was trying to juggle work, gym and the blog.  After being a housewife for over two years, balancing all of this has proved to be a bit of a challenge.  With this change in schedule getting ready for work in the morning has also required some shortcuts here and there.

I try to get at least eight hours of sleep every single night of the week.  So, when I have a later night than usual, I tend to get up a little later too, giving me less time for my morning routine.  I still believe it looks quite unprofessional to go to work without some kind of makeup on so even when I'm in a rush, I won't sacrifice that.

Therefore, in this blog, I wanted to share with you my super speedy 5 minute every day eye makeup look.

In addition to my usual BB cream base, blush and highlighter which can be applied in under 5 minutes,  I like to use just one eyeshadow colour when I'm in a rush.

My colour of choice is usually MAC eyeshadow in Mulch.  It's a dark brown that can be used for a smokey eye look or blended out for a very natural finish.


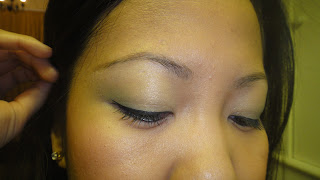
Along with my usual black mascara, I pair the single colour with a beautiful green eyeliner.  My favourite at the moment is the Velvet Touch Eyeliner from Gosh Cosmetics in Woody Green.  It's waterproof and lasts through the day without smudging.  I love the colour as well.  It's a deep green that is noticeably green but subtle at the same time.


Together with the brown eyeshadow, it adds a nice pop of colour to an incredibly simple look.


Because the eyes are so simple and neutral, I also like to brighten the look with my Belladonna Intense Lipgloss from Illamasqua.


It's such a simple look that takes just ten minutes in total but it just brightens up my whole face and makes me look completely refreshed for work.

For more information on what you can do with coloured eyeliners, you can also go to my previous blog titled Playful Eyeliners.

Note:  For those of you wondering, it does look like I cut my hair in this photo but I did not.  Just my bangs.  

Thursday, March 22, 2012

Covering an Accidental Sunglass Tan line!!!

First of all, I'd like to apologize for not having added any new posts lately.  Between juggling work, gym after work and a hungry husband...after work, it's been really difficult to work on the blog.  However, I will try to be more diligent, with hopefully at least one new post each week. 

So, I've just come back from a family ski/snowboarding trip in Meribel, France.  The weather was amazing and in the plus double digits.  The sun was shining all week long and there was almost no sight of even a single cloud in the sky.  Great for skiing and snowboarding in t-shirts but absolutely horrendous for tan lines!!!

Because snow reflects the sun's rays off of it, it is incredibly necessary to ski with sunglasses or a mask on to protect your eyes.  It is also important to wear a sunblock with high SPF.  Unfortunately, I had an SPF 30 sunblock on my face with an SPF 42 BB cream over that.  For those of you who don't know this, wearing the SPF 30 and then SPF 42 doesn't mean I have a combined total of SPF 72 on.  In fact, I've been told that the first thing you put on will absorb into your skin and will sort of block the second SPF product.  So, the result was a not so high protection factor on my face and a horrible tan line.


So, this is how you can cover it up without using a full coverage foundation that will make you look like you've got way too much makeup on for the day. 

Start by getting a slightly darker foundation than what you normally use.  Go much darker if the tanned part of your face is significantly much darker than usual.  A darker colour will help to blend out the contrast naturally.  Don't try to lighten the darker part of your face with a lighter foundation as you could end up with an ashy finish. 


Next, use a highlighter above your cheekbones.  Something a little shimmery will work better.  This will create an illusion that the lighter part of your face, above the cheeks and below your eyes, was purposely lightened for highlighting purposes. 


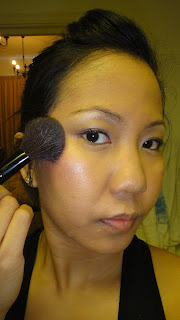
Finally, use a blusher and apply it over the area where the light and dark areas meet. 


Voila!!!  It's as simple as that!!!


Here's an important reminder for when you're doing any kind of outdoor sports!!!  High SPF in your makeup is never as good as sunblock.  So, always apply a sunblock with a high SPF before you put on your makeup!!!  EVEN IF YOUR MAKEUP HAS A HIGH SPF!!

Thursday, February 16, 2012

Naturally Green!!!

Common eyeshadow colours we tend to play with are usually, pink, purple, blue, brown and silver.  These are pretty safe colours that go well with many different skin tones.  Green is not a colour we use very often.  We usually think green is a very bold colour that should only be reserved for a big night out, or for the very brave.  However, the right shade of green can look pretty natural and appropriate for a day out or for work.

I've used 3 different shades of green to give you an example of how natural it can be.

1) L'Oreal Infallible eyeshadow in Permanent Khaki
2) Makeup Forever eyeshadow in 57
3) Makeup Forever eyeshadow in 93

Permanent Khaki paired with MAC eyeshadow in Mulch

Apologies that the Permanent Khaki looks silver but it's actually a deep shade of khaki green


Permanent Khaki paired with MAC eyeshadow in Electra


Makeup Forever in 57 and 93


So there you go, three different combinations of green, all with a very natural finish.  The last look has a surprisingly pastel finish and is perfect for a spring look. 

You never know how the colours are gonna look like on you.  If you're in a makeup store and love a colour you see, ask a makeup artist to try it out on you rather than just testing it out on your hands.  It may look more natural on your eyes than it does in the pot. 

Wednesday, February 8, 2012

Playful Eyeliners!!!!

A fun and young look that's super trendy is the single line of coloured eyeliner on your eyes paired with a black or brown mascara.  It's a great look for teens and girls in their early 20s for everyday wear.  For those of us who are a little older, we can pull this look off too but stick with more conservative colours like deep purple and blue.  This is a great way to give your eyes a little pop of colour when you have no time to fuss with eyeshadow. 


I used a deep purple/plum pencil eyeliner from MAC.  This is the most flattering colour for any age and any skin tone. 


I used a blue pencil liner from Makeup Forever's Aqua Eyes line.  Blue is a great, eye catching colour.  It can be a little daring depending on the shade of blue you pick but it will brighten up your eyes for sure.  For girls who generally do wear blue eyeshadow, this is a great substitute for those mornings you just couldn't get out of bed early enough to do the whole works. 


I used Illamasqua medium pencil in Torment.  Yes, this pinkish red is a little unconventional but I just wanted to show how you youngsters out there can play around with the range of colours available. Try out some, pink, green, gold, silver orange etc.  It's fun and easy and while you are in your teens and early 20s, you may as well take advantage of the fact that you can get away with this type of playfulness.


So where can you find a fantastic range of coloured eyeliners?

Illamasqua has amazing colour pencils in all shades and sizes for use on your eyes, face, lips and body.   They have a smooth texture that glides on your skin beautifully.

MAC fluidliner is another great option.  I have one in Blacktrack but it comes in a wide range of colours.  Use an angled brush to apply it.  It will give you the best control!!

Makeup Forever has a range of super waterproof pencil eyeliners that come in a range of fun colours.  The Aqua Eyes pencil liner in blue is one of my beach vacation must-haves.

Monday, February 6, 2012

Favourite Makeup Pros and Cons

You've probably noticed from all the different blog entries I've done, that there are several makeup products I use over and over again.  I do indeed have my favourites but just like anything in this world, nothing is perfect...well...almost nothing.  Some things do come close to perfect but even those have their pros and cons.  Here's a list of my absolute favourites and the good and bad about each one. 

K-Palette 1 Day Tattoo Real Lasting Eyeliner


Pros:  Provides great control when doing fine lines and great control overall.  Lasts all day long and has a perfect, jet black liquid liner look.

Cons:  Not as waterproof as the name indicates it should be.  When it comes in contact with rain, tears or any type of water, it doesn't just smudge...it runs!!!!


MAC Duo Fibre Brush


Pros:  Spreads my foundation evenly whether it's liquid or powder.  Helps to achieve a beautiful, natural finish with great coverage.

Cons:  I do take care of my brushes but this one seems to shed easily.  In fact, there's always a hair or two left on my face after using this brush. 


Missha Perfect M BB Cream


Pros:  It has a wonderful texture and gives great coverage with a very natural finish that lasts all day.

Cons: Not dark enough when I've been out in the sun and I'm more tanned than usual.


Majorlica Majorca Glam Lash Mascara and Maybeline Volume Express Cat Eyes


Pros:  Both create thick, clumpless lashes that lasts all day.  They are extremely waterproof, don't smudge and are the mascara I like to use when I'm at the beach.

Cons:  Incredibly difficult to remove even with the best eye makeup removers.


MAC Studio Fix Powder Plus 


Pros:  Works great when layering with other liquid foundations for maximum staying power.  It's also really easy to apply.

Cons:  On its own, it doesn't last all day on my oily skin. 


MAC Paintpot


Pros:  It's a great cream shadow that lasts all day.  It works great as a base under powder eyeshadow and makes it last even longer. 

Cons:  The product gets dry after some time and becomes a little hard to extract from the container. 


And finally here's the one product I have absolutely ZERO complaints about!!!

MAC Powder Eyeshadow


This is my ultimate favourite and what I think many people would agree, the best quality eyeshadow!!!!  Even on oily lids it doesn't get into your creases.  It lasts all day long and has great build-able colour intensity.

If there's a product you use that you have absolutely no complaints about, let me know what it is!!!  I'm always interested in trying out makeup products that have great reviews.  

Sunday, January 29, 2012

Natural False Lashes!

False eyelashes have been a huge trend for many years.  Before moving to the UK, I thought it was probably just really big in Asia due to the fact that most of us have very short and scanty eyelashes.  After coming to the UK, I've realized it's incredibly popular here too.  Adding falsies to complete your overall look is great but some lashes are just a little OTT for everyday wear.  Stick to natural looking eyelashes that add volume rather than thick, long, glamour lashes.

Here's a look at some ways to emphasize your peepers!!!

Corner Lashes:

A great way to make your lashes appear longer but natural is to use eyelashes only on the outer corners of your eyes.  You can either buy the ones that come in individual bunches or cut the ends off any pair you already have at home


Cris-Cross Lashes:

I find this to be the most natural look of all when it comes to full length lashes.  This type of falsies add a lot of fullness and natural length without being over the top.  These are great for a big night out as well.  If you want to create even more natural fullness, just double up on the lashes.


What You Should Avoid for the Day:

Lashes with thick hairs clumped together can look extremely unnatural, like the ones I wore for New Year's Eve!!   They are fun for events and fancy dress parties but not for the day.  Thick, fluttery half lashes should be avoided too if you want a natural look.  It's really easy to tell what will be over the top!  If they look really thick or really long, they won't look natural!!


Saturday, January 28, 2012

The Kim K Smokey Eye Look for Hooded Eyelids!!!!

Two weeks ago, I shared a video with you of Kim Kardashian's makeup  artist doing a smokey eye look on her.  The look consisted of a paler lid with dark corners and creases, highlighting a significant contrast between the two colours.  Now, as I mentioned in that blog, this look is a lot easier to accomplish if you have deep set eyes as you have a natural receding crease to follow and your eyelid space is thick enough for the lighter colour to be seen.

I promised to do the hooded eyelid or monolid version so here it is!!!


For girls with hooded eyelids or monolids, we need to apply the darker colour slightly above our natural crease if we want the lighter colour and contrast to be noticeable.

The line has to be drawn precisely and then blended out.  A pencil brush is the best way to do this.  After applying a lighter shadow all over the lids (stopping just above your crease), apply the darker colour on your corners and above your natural crease as well, creating an illusion of a deeper crease when your eyes are open.  Blend to soften the harsh edges.


Kim's makeup artist only applied eyeliner on her lower lash line.  I feel naked without eyeliner on my upper lash line but for the purpose of emphasizing the colour contrast, I suggest you skip it too.  Because our eyelids are narrow, applying eyeliner on the upper lash line will cover too  much eyelid space.  Complete the look with a pair of natural false lashes and you're done.


This is not an easy look to accomplish but keep on practicing and you'll get better.  Play around with different tools as well.  You may find using something other than a pencil brush easier. I like to keep things natural but feel free to make your darker colour even darker than what I've done. 

On my eyes:


  • MAC eyeshadow in All That Glitters and Contrast
  • Kryolan eyeshadow in white
  • MAC Prep and Prime in Medium
  • Diorshow waterproof eyeliner in black
  • Rimmel Max Volume Flash mascara in black

Sunday, January 22, 2012

Beauty Makeover #1

I've had plans to do several makeovers and post them on my blog!  Last night, I finally managed to get one makeover done.  I did my friend Anita's makeup for the Asian party we went to and I'd like to share the makeover with you!

Anita's Makeup Profile:
Anita likes to keep things simple and she rarely wears makeup.  In fact, I think she never wore makeup until recently, but only when she's going to a party. 

What I Did:
Because Anita has amazing eyes I wanted them to stand out a little more.  I used a dark brown colour on her eyelids and a dark blue (MAC eyeshadow in Contrast) in her corners and creases.  I love a thicker liner on Indian eyes so I tried that out on her.  She used a deep brownish red lipstick which I think matches her skin tone perfectly. 

Here's the makeover!!! 

without makeup

with makeup

I think she looks good either way but the look with makeup is certainly more fitting for a night out!!!  And, it seems to have made her quite a hot commodity at last night's party!!!!