Showing posts with label eyeshadow. Show all posts

Sunday, September 30, 2012

Cut Crease Eyeshadow Tutorial for Asian Hooded Eyes!!!

So, as promised, here is the cut crease makeup tutorial on the look I did last week. 

Enjoy!!!


 One more thing!!!  Don't know if you realized, but I had a hair cut this weekend!!!


 I found a wonderful hair salon and hairstylist in London.  It's a place called B:Zar.   Now I don't have to wait until I return to Singapore for a hair cut.  It's a Japanese hair salon and every single stylist in there is Japanese.  I find that it's really important for me to have my hair cut by a stylist that understands Asian hair really well, and one that understand Asian trends!!  Exactly one year in London and I've found my place!!!


Thursday, September 27, 2012

Cut Crease for Hooded Eyelids!!!

I've always loved a cut crease eyeshadow look.  You see this a lot in Middle Eastern and Indian style of makeup.  It is such a great look for defining the eyes.  For those of you who are unfamiliar with the term 'cut crease', it's basically an eyeshadow look in which the surface of the eyelids is much lighter than the area surrounding it and the separation between the paler eyelid and darker eyeshadow around it is very defined.  It's very easy to do if you have deep set eyes and very defined double eyelids.  But for us girls with hooded eyelids, the look is harder to achieve and requires several layers of eyeshadow to create an illusion of deep set eyes.

The benefit of a hooded eyelid girl wearing this style of makeup?  Well, you guessed it!!  It's the usual.  This look creates more defined eyes, an illusion of bigger eyes and having well defined double eyelids. 

I was playing around with this look yesterday and thought I'd share it with you.  But stay tuned for next week's tutorial on how you can achieve this look yourself. 


Thursday, February 16, 2012

Naturally Green!!!

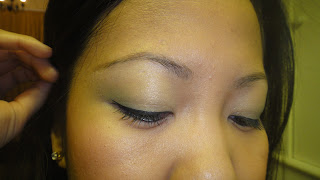
Common eyeshadow colours we tend to play with are usually, pink, purple, blue, brown and silver.  These are pretty safe colours that go well with many different skin tones.  Green is not a colour we use very often.  We usually think green is a very bold colour that should only be reserved for a big night out, or for the very brave.  However, the right shade of green can look pretty natural and appropriate for a day out or for work.

I've used 3 different shades of green to give you an example of how natural it can be.

1) L'Oreal Infallible eyeshadow in Permanent Khaki
2) Makeup Forever eyeshadow in 57
3) Makeup Forever eyeshadow in 93

Permanent Khaki paired with MAC eyeshadow in Mulch

Apologies that the Permanent Khaki looks silver but it's actually a deep shade of khaki green


Permanent Khaki paired with MAC eyeshadow in Electra


Makeup Forever in 57 and 93


So there you go, three different combinations of green, all with a very natural finish.  The last look has a surprisingly pastel finish and is perfect for a spring look. 

You never know how the colours are gonna look like on you.  If you're in a makeup store and love a colour you see, ask a makeup artist to try it out on you rather than just testing it out on your hands.  It may look more natural on your eyes than it does in the pot. 

Thursday, December 22, 2011

Inspired by Venice and Illamasqua!!!!

Mysterious like a phantom in the darkest night, hidden by a flawless exterior, revealing only the exquisite beauty of a Venetian mask!

This is my Alter Ego.  Inspired by Illamasqua.

What I used:


A range of Illamasqua Liquid Metal colours.  For more information on the products go to:
www.illamasqua.com

Eyeshadow Palettes and Which Colours to Use!!!

I've spent this week talking about and showing you the different eyeshadow colours you can combine.  The simplest and most brainless way to go about choosing eyeshadow colours is to go with a palette. Usually, palettes come in 4 colours.  You'll have a darker colour, a medium colour and maybe 2 lighter colours.  This is because they are giving you an option for the evening (usually darker and more intense) and an option for the day (usually lighter and more natural).

Have a look at the palette below from Illamasqua.


Just choose any three shades you want, remembering to always use the darker colour on the outer corners of your eyes, the medium colour as the all over base and the lightest colour on the inner corners of your eyes and on your brow bone.  These colours match and have been put together for your convenience.  Use a combination of any 3 in the palette.  You can't go wrong!!

Now take a look at the palette below from Ros n' Roy.

Ros n' Roy is available at Bugis Junction in Singapore

It looks intimidating, but if you look carefully, the matching colours have been organized in each column in pairs with the the lightest (highlighter) colours on the far right column.  Pick a combination of any 2 using the dark, medium and light technique, pair it up with a highlighter and there is no way you can go wrong. 

Important tip:  When in doubt, white and cream coloured highlighters go with any colour combination.

Palettes are out there for consumers like you.  So take advantage of them. 

Wednesday, December 21, 2011

Matching Eyeshadow Colours: Day 3

Smokey eyes can be achieved with a whole array of colours too.  Traditionally, a shimmery grey or silver is used as the all over base colour, with a black eyeshadow on the outer corners.  However, you can create a smokey eye look with purples, blues, greens, browns etc. 

Today, I chose to go with a traditional grey as I had used a purple in my previous blog on smokey eyes. 


FOR A LOOK AT A PURPLE SMOKEY EYE, CLICK ON THE LINK BELOW:
http://jazzo-princessjasminem.blogspot.com/2011/12/smokey-eyes-for-night-out.html

What I used:


OUTER CORNER: MAC eyeshadow in Black Ted
ALL OVER BASE: MAC eyeshadow in Electra
LIGHTEST: Krayolan eyeshadow in white

FOR MORE INFORMATION ON HOW TO APPLY THESE COLOURS, PLEASE SEE PREVIOUS BLOG:
Basic Eyeshadow Application
http://jazzo-princessjasminem.blogspot.com/2011/12/basic-eyeshadow-application.html

Here are a few more colour combinations for smokey eyes!!

MAC Black Ted            MAC Blue Edge            Krayolan white
MAC Black Ted          MAC Pompous Blue          Krayolan white
MAC Black Ted          MAC Beauty Marked          Krayolan white
MAC Black Ted              MAC Mulch              Krayolan white

FOR A CLOSER LOOK AT THE EYESHADOW COLOURS GO TO:
http://www.maccosmetics.co.uk/product/shaded/154/363/Eyes/Shadow/Eye-Shadow/index.tmpl

Important tip:  In order to make the smokey eye even darker, apply a black cream shadow first.  I like to use MAC Paintpot in Blackboard.


Thursday, December 15, 2011

Basic Eyeshadow Application!

I realized after blogging about two different looks, for those who are fairly new to makeup, I should probably explain some basic eyeshadow application techniques.  I keep writing reminders to use darker colours on the outer corners and lighter colours in the inner corners and BLEND!  But what does all this really mean??  This may clear things up a little.

STEP 1:
After applying your eyeshadow primers (I like MAC Prep and Prime with paintpot over it) over the entire surface of your eyelids, the first colour you should apply is your medium base colour.  Apply it over the eyelid but stop at where you feel the bone of your eye socket.


STEP 2:
Blend to soften the hard edges!


STEP 3:
Apply the darkest colour to the outer corners of your eyes!


STEP 4:

Blend to soften the hard edges and to fade it into the first colour!


STEP 5:
Apply the lightest colour on the inner corners of the eyes, just above your lashes, right on the corners and right below the lower lash line.


STEP 6:
Blend to soften the hard edges!


STEP 7:
Apply the same light colour as you did in the inner corners but this time on your brow bone, just below your eyebrows!


STEP 8:
That's right!!!  Blend to soften the hard edges and to let it fade into the colour below it so that all the colours now melt together!


STEP 9:
Almost there!!!  This is what it looks like all together!


STEP 10:
Apply eyeliner, mascara and eyebrow pencil!  Voila!!!  You are done!!!!


Important tips: 

1) You can apply this technique to any colour combination you choose!!!

2) CLEAN UP YOUR EYEBROWS, it'll look so much nicer.  I know...I'm so in need of an eyebrow cleanup myself!!!