Monday, April 9, 2012

Revlon Lipbutters!!!! Finally in the UK!!!

For those of you who didn't realize this, the Revlon Lipbutters that have been around in the US and probably Canada since last year, have finally made their way to the UK.  I've been reading about this product all over the blog world and have never waited so impatiently for a makeup product to come out.

Last week, I went out to get my very own collection of colours but was very disappointed to find out that many of the colours I wanted were already out of stock.  I managed to get 2 out of the several I wanted.

I've order 3 more online and will post them up when they arrive.

First of all, I want to talk about the product.

Texture:  The product is quite creamy and sort of half way between a lipgloss, lipbalm and a lipstick.  It's super moisturizing and feels more like you've got a lipbalm on rather than a lipstick.

Colour:  The colour is buildable. You can wear it sheer or apply a few coats to make it more opaque and intense.  The two colours I bought were sheer but able to build to a more intense colour.  However, from other reviews I read, depending on the colour, some may be more creamy and intense than others.

Finish:  I love the look of this lipstick.  Its quite glossy but sort of looks like you've applied a gloss over a lipstick.

Overall opinion:  I love this lipstick and I think it's really been worth the wait.  The price in the UK at GBP 7.99 is also amazing.  Boots is currently having a 3 for 2 sale so it's actually even cheaper than that if you're buying more than one colour.  My lips feel great.  It feels like I've applied lipbalm on before hand and my lips feel incredibly soft and moisturized.

The two colours I bought were Cupcake and Berry Smoothie.  I was looking for Peach Parfait which was sold out in all stores I went to and for some reason, Cherry Tart which is available in the US is not available here.  It's supposed to be a sheer red.  I'm going to try Candy Apple instead and let you guys know how that is as well.

For now, here are the Cupcake and Berry Smoothie looks.

Cupcake:
A very light pastel pink
 It's a great everyday look that can balance out a smokey or darker eyeshadow look


Berry Smoothie:
A medium toned raspberry pink


Can be worn everyday with neutral eyes


Stay tuned for a look at 3 more colours from Revlon Lipbutters!!!


Saturday, March 31, 2012

Super Quick Green Eyeliner Every Day Look!

As I promised last week, I would write at least one blog a week to fill you all in on what's going on in my little makeup world.  I also did mention that the blog posts had halted temporarily due to the fact that I was trying to juggle work, gym and the blog.  After being a housewife for over two years, balancing all of this has proved to be a bit of a challenge.  With this change in schedule getting ready for work in the morning has also required some shortcuts here and there.

I try to get at least eight hours of sleep every single night of the week.  So, when I have a later night than usual, I tend to get up a little later too, giving me less time for my morning routine.  I still believe it looks quite unprofessional to go to work without some kind of makeup on so even when I'm in a rush, I won't sacrifice that.

Therefore, in this blog, I wanted to share with you my super speedy 5 minute every day eye makeup look.

In addition to my usual BB cream base, blush and highlighter which can be applied in under 5 minutes,  I like to use just one eyeshadow colour when I'm in a rush.

My colour of choice is usually MAC eyeshadow in Mulch.  It's a dark brown that can be used for a smokey eye look or blended out for a very natural finish.


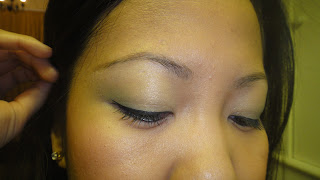
Along with my usual black mascara, I pair the single colour with a beautiful green eyeliner.  My favourite at the moment is the Velvet Touch Eyeliner from Gosh Cosmetics in Woody Green.  It's waterproof and lasts through the day without smudging.  I love the colour as well.  It's a deep green that is noticeably green but subtle at the same time.


Together with the brown eyeshadow, it adds a nice pop of colour to an incredibly simple look.


Because the eyes are so simple and neutral, I also like to brighten the look with my Belladonna Intense Lipgloss from Illamasqua.


It's such a simple look that takes just ten minutes in total but it just brightens up my whole face and makes me look completely refreshed for work.

For more information on what you can do with coloured eyeliners, you can also go to my previous blog titled Playful Eyeliners.

Note:  For those of you wondering, it does look like I cut my hair in this photo but I did not.  Just my bangs.  

Thursday, March 22, 2012

Covering an Accidental Sunglass Tan line!!!

First of all, I'd like to apologize for not having added any new posts lately.  Between juggling work, gym after work and a hungry husband...after work, it's been really difficult to work on the blog.  However, I will try to be more diligent, with hopefully at least one new post each week. 

So, I've just come back from a family ski/snowboarding trip in Meribel, France.  The weather was amazing and in the plus double digits.  The sun was shining all week long and there was almost no sight of even a single cloud in the sky.  Great for skiing and snowboarding in t-shirts but absolutely horrendous for tan lines!!!

Because snow reflects the sun's rays off of it, it is incredibly necessary to ski with sunglasses or a mask on to protect your eyes.  It is also important to wear a sunblock with high SPF.  Unfortunately, I had an SPF 30 sunblock on my face with an SPF 42 BB cream over that.  For those of you who don't know this, wearing the SPF 30 and then SPF 42 doesn't mean I have a combined total of SPF 72 on.  In fact, I've been told that the first thing you put on will absorb into your skin and will sort of block the second SPF product.  So, the result was a not so high protection factor on my face and a horrible tan line.


So, this is how you can cover it up without using a full coverage foundation that will make you look like you've got way too much makeup on for the day. 

Start by getting a slightly darker foundation than what you normally use.  Go much darker if the tanned part of your face is significantly much darker than usual.  A darker colour will help to blend out the contrast naturally.  Don't try to lighten the darker part of your face with a lighter foundation as you could end up with an ashy finish. 


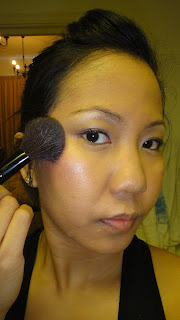
Next, use a highlighter above your cheekbones.  Something a little shimmery will work better.  This will create an illusion that the lighter part of your face, above the cheeks and below your eyes, was purposely lightened for highlighting purposes. 


Finally, use a blusher and apply it over the area where the light and dark areas meet. 


Voila!!!  It's as simple as that!!!


Here's an important reminder for when you're doing any kind of outdoor sports!!!  High SPF in your makeup is never as good as sunblock.  So, always apply a sunblock with a high SPF before you put on your makeup!!!  EVEN IF YOUR MAKEUP HAS A HIGH SPF!!

Thursday, February 16, 2012

Naturally Green!!!

Common eyeshadow colours we tend to play with are usually, pink, purple, blue, brown and silver.  These are pretty safe colours that go well with many different skin tones.  Green is not a colour we use very often.  We usually think green is a very bold colour that should only be reserved for a big night out, or for the very brave.  However, the right shade of green can look pretty natural and appropriate for a day out or for work.

I've used 3 different shades of green to give you an example of how natural it can be.

1) L'Oreal Infallible eyeshadow in Permanent Khaki
2) Makeup Forever eyeshadow in 57
3) Makeup Forever eyeshadow in 93

Permanent Khaki paired with MAC eyeshadow in Mulch

Apologies that the Permanent Khaki looks silver but it's actually a deep shade of khaki green


Permanent Khaki paired with MAC eyeshadow in Electra


Makeup Forever in 57 and 93


So there you go, three different combinations of green, all with a very natural finish.  The last look has a surprisingly pastel finish and is perfect for a spring look. 

You never know how the colours are gonna look like on you.  If you're in a makeup store and love a colour you see, ask a makeup artist to try it out on you rather than just testing it out on your hands.  It may look more natural on your eyes than it does in the pot. 

Monday, February 13, 2012

Estee Lauder Advanced Night Repair!!

I don't know how many of you religiously read reviews on beauty products but there are a number of products that have had amazing reviews from users all over the world.  Yes, you'll see reviews in magazines and articles that show you before and after photos, but how do you know if any of those are actually digitally enhanced?

I'm about to do something that I consider quite brave and in order to do so, I will strip off all my makeup and show you every flaw on my face.  I recently bought the Estee Lauder Advanced Night Repair serum.  I've heard great things about how it's one of the few products out there that not only prevents future damage to the skin but also repairs it.  I was battling between trying out Strivectin SD and the Advanced Night Repair serum and decided to go with the latter because it had outstanding reviews and the former, although has a lot of hype around it, did not have stellar reviews.


The Advanced Night Repair promises to reduce the signs of aging such as fine lines, wrinkles, scars, age spots etc.  Apparently, it is so popular due to its effectiveness, a bottle is sold every 8 seconds around the world. I have been noticing lines forming on my forehead over the last year and I'm not so sure if they have gotten worse or I'm just more aware of them because I no longer have bangs to cover them.  Nevertheless, the fine lines and past acne scarring have been bothering me a lot and I'm determined to find a product other than botox that will get rid of them or at least significantly reduce them.

So, over the next few months, I plan on showing you the progress, starting with this blog in which I have only used the product for one night. Keep in mind, I am also using the Estee Lauder Idealist Skin Illuminator which is supposed to reduce dark spots as well.  However, I do believe any significant progress would be more credited to the Advance Night Repair as the Idealist Skin Illuminator had some pretty average reviews. 


Here are my problem areas!!  Let's see if there is a difference in about a month or so. You can be the judge for yourself and I promise you these photos will have no photoshopping at all. 

Problem: Fine lines across my forehead and especially on both the left and right sides

Problem:  Acne scarring and uneven skintone

Problem: Acne scarring and uneven skintone


Wednesday, February 8, 2012

Playful Eyeliners!!!!

A fun and young look that's super trendy is the single line of coloured eyeliner on your eyes paired with a black or brown mascara.  It's a great look for teens and girls in their early 20s for everyday wear.  For those of us who are a little older, we can pull this look off too but stick with more conservative colours like deep purple and blue.  This is a great way to give your eyes a little pop of colour when you have no time to fuss with eyeshadow. 


I used a deep purple/plum pencil eyeliner from MAC.  This is the most flattering colour for any age and any skin tone. 


I used a blue pencil liner from Makeup Forever's Aqua Eyes line.  Blue is a great, eye catching colour.  It can be a little daring depending on the shade of blue you pick but it will brighten up your eyes for sure.  For girls who generally do wear blue eyeshadow, this is a great substitute for those mornings you just couldn't get out of bed early enough to do the whole works. 


I used Illamasqua medium pencil in Torment.  Yes, this pinkish red is a little unconventional but I just wanted to show how you youngsters out there can play around with the range of colours available. Try out some, pink, green, gold, silver orange etc.  It's fun and easy and while you are in your teens and early 20s, you may as well take advantage of the fact that you can get away with this type of playfulness.


So where can you find a fantastic range of coloured eyeliners?

Illamasqua has amazing colour pencils in all shades and sizes for use on your eyes, face, lips and body.   They have a smooth texture that glides on your skin beautifully.

MAC fluidliner is another great option.  I have one in Blacktrack but it comes in a wide range of colours.  Use an angled brush to apply it.  It will give you the best control!!

Makeup Forever has a range of super waterproof pencil eyeliners that come in a range of fun colours.  The Aqua Eyes pencil liner in blue is one of my beach vacation must-haves.

Monday, February 6, 2012

Favourite Makeup Pros and Cons

You've probably noticed from all the different blog entries I've done, that there are several makeup products I use over and over again.  I do indeed have my favourites but just like anything in this world, nothing is perfect...well...almost nothing.  Some things do come close to perfect but even those have their pros and cons.  Here's a list of my absolute favourites and the good and bad about each one. 

K-Palette 1 Day Tattoo Real Lasting Eyeliner


Pros:  Provides great control when doing fine lines and great control overall.  Lasts all day long and has a perfect, jet black liquid liner look.

Cons:  Not as waterproof as the name indicates it should be.  When it comes in contact with rain, tears or any type of water, it doesn't just smudge...it runs!!!!


MAC Duo Fibre Brush


Pros:  Spreads my foundation evenly whether it's liquid or powder.  Helps to achieve a beautiful, natural finish with great coverage.

Cons:  I do take care of my brushes but this one seems to shed easily.  In fact, there's always a hair or two left on my face after using this brush. 


Missha Perfect M BB Cream


Pros:  It has a wonderful texture and gives great coverage with a very natural finish that lasts all day.

Cons: Not dark enough when I've been out in the sun and I'm more tanned than usual.


Majorlica Majorca Glam Lash Mascara and Maybeline Volume Express Cat Eyes


Pros:  Both create thick, clumpless lashes that lasts all day.  They are extremely waterproof, don't smudge and are the mascara I like to use when I'm at the beach.

Cons:  Incredibly difficult to remove even with the best eye makeup removers.


MAC Studio Fix Powder Plus 


Pros:  Works great when layering with other liquid foundations for maximum staying power.  It's also really easy to apply.

Cons:  On its own, it doesn't last all day on my oily skin. 


MAC Paintpot


Pros:  It's a great cream shadow that lasts all day.  It works great as a base under powder eyeshadow and makes it last even longer. 

Cons:  The product gets dry after some time and becomes a little hard to extract from the container. 


And finally here's the one product I have absolutely ZERO complaints about!!!

MAC Powder Eyeshadow


This is my ultimate favourite and what I think many people would agree, the best quality eyeshadow!!!!  Even on oily lids it doesn't get into your creases.  It lasts all day long and has great build-able colour intensity.

If there's a product you use that you have absolutely no complaints about, let me know what it is!!!  I'm always interested in trying out makeup products that have great reviews.