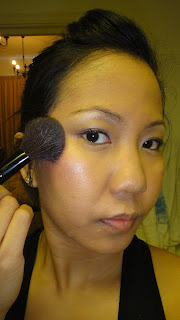
As I promised last week, I would write at least one blog a week to fill you all in on what's going on in my little makeup world. I also did mention that the blog posts had halted temporarily due to the fact that I was trying to juggle work, gym and the blog. After being a housewife for over two years, balancing all of this has proved to be a bit of a challenge. With this change in schedule getting ready for work in the morning has also required some shortcuts here and there.
I try to get at least eight hours of sleep every single night of the week. So, when I have a later night than usual, I tend to get up a little later too, giving me less time for my morning routine. I still believe it looks quite unprofessional to go to work without some kind of makeup on so even when I'm in a rush, I won't sacrifice that.
Therefore, in this blog, I wanted to share with you my super speedy 5 minute every day eye makeup look.
In addition to my usual BB cream base, blush and highlighter which can be applied in under 5 minutes, I like to use just one eyeshadow colour when I'm in a rush.
My colour of choice is usually MAC eyeshadow in Mulch. It's a dark brown that can be used for a smokey eye look or blended out for a very natural finish.
Along with my usual black mascara, I pair the single colour with a beautiful green eyeliner. My favourite at the moment is the Velvet Touch Eyeliner from Gosh Cosmetics in Woody Green. It's waterproof and lasts through the day without smudging. I love the colour as well. It's a deep green that is noticeably green but subtle at the same time.
Together with the brown eyeshadow, it adds a nice pop of colour to an incredibly simple look.
Because the eyes are so simple and neutral, I also like to brighten the look with my Belladonna Intense Lipgloss from Illamasqua.
It's such a simple look that takes just ten minutes in total but it just brightens up my whole face and makes me look completely refreshed for work.
For more information on what you can do with coloured eyeliners, you can also go to my previous blog titled Playful Eyeliners.
Note: For those of you wondering, it does look like I cut my hair in this photo but I did not. Just my bangs.


